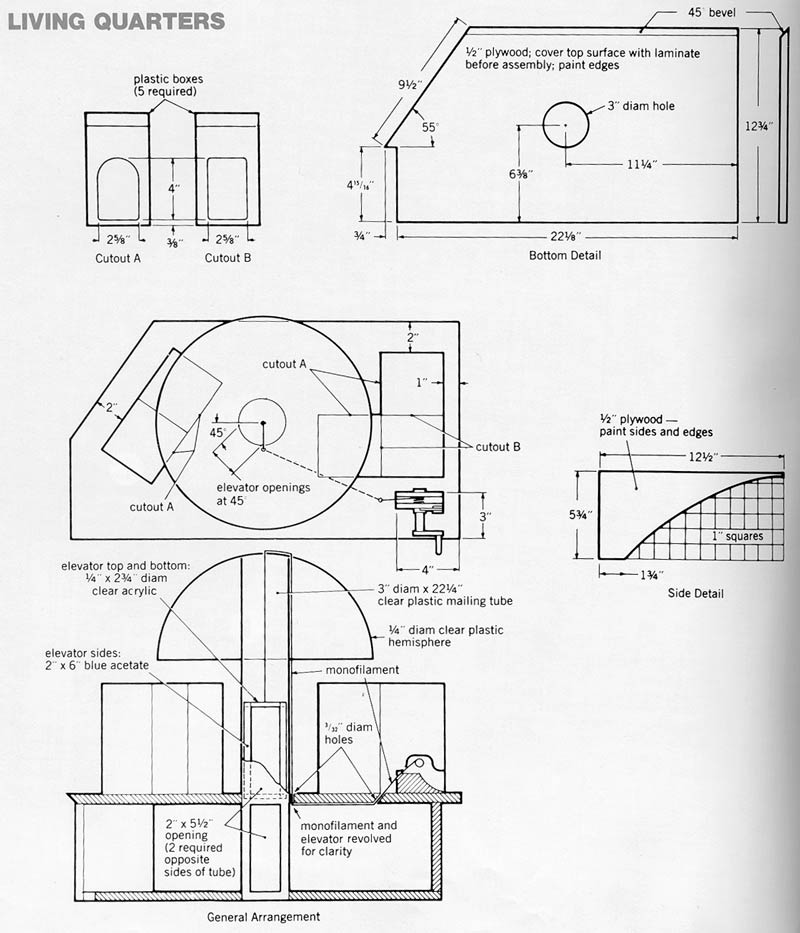
Living Quarters
Materials 1/2"x24"x36" plywood; 3/4"x18"x24" plywood; 24"x54" plastic-laminate (see General Directions); 5 clear plastic boxes with lids, each 4"x4"x7 1/4"; 3"-diam.x36" clear plastic mailing tube; 14"-diam. clear plastic hemisphere; blue acetate as specified; nylon monofilament. For elevator crank mechanism 1 1/16x2 1/2"x12" pine lattice; scrap dowel in 1/8", 1/2", 7/8" and 3" diam.
From 1/2" plywood, cut top (bevel two edges after lamination), bottom, arched side, front and solid side. Cut 5"-diam. holes in fron twith jig-saw, then laminate both sides.
Assemble top, arched side and front with glue and screws. Turn upside-down; place bottom on top. Mark position of 3"-diam. hole. Clamp top and bottom together to drill holes with an expansive bit; remove clamp.
Turn unit right-side-up, laminate top and bottom. Attach bottom and solid side to assemble structure.
Cut mailing tube to 22 1/4" length; cut out bottom and top doorways for elevator. Elevator car consists of 1/4"x2 3/4"-diam. clear acrylic disc top and same size bottom, hung together by two strips of 2"x6" blue acetate. Cut out these parts and drill a hole in car top for monofilmanet. Cement acetate to discs; cement shaft in its holes. Drill 2 holes for monofilament in hemisphere.
Find center of hemisphere and mark 1 1/2"-radius circle with a non-permanent marker and compass. To assemble, place end of monofilmament through hole in car top and knot end. Place car in shaft. Thread other end of monofilament through center hole in hemisphere from inside to out, then back in through 2nd hole. Apply cement around top of shaft. Place hemisphere with its marks aligned with shaft edge.
Install elevator crank mechanism (see directions below) and tie end of monofilament to crank shaft.
Attach Trick Staircase to solid side of Living Quarters with contact cement.
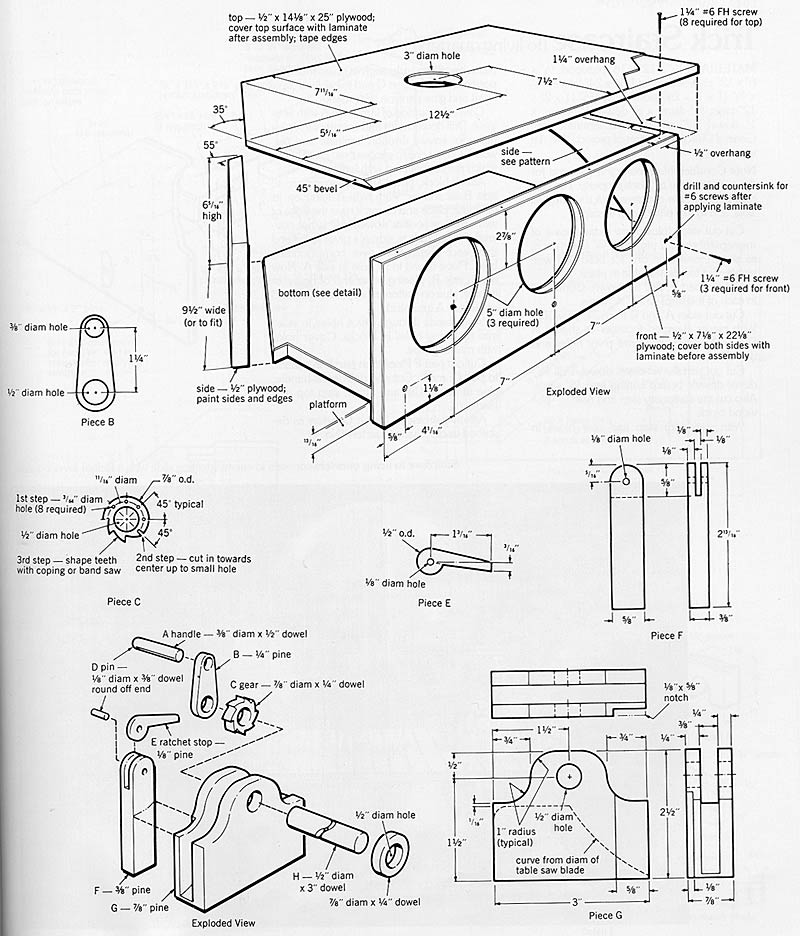
Crank mechanism Cut pine parts (since parts are so small, you will find it easier to use larger pieces of pine in right thickness). Assemble, following diagram. If crank axle doesn't turn freely, sand dowel to reduce size slightly. All parts are glued, except those that move (axle and ratchet stop).